
Earlier this week I was fortunate to be able to work with Isaac Fisher, proprietor of Pachyderm Furniture in Fort Bragg, CA to build some wood pieces for my tokonoma installation concept. Here are the technical drawings I prepared and discussed with Isaac in advance:
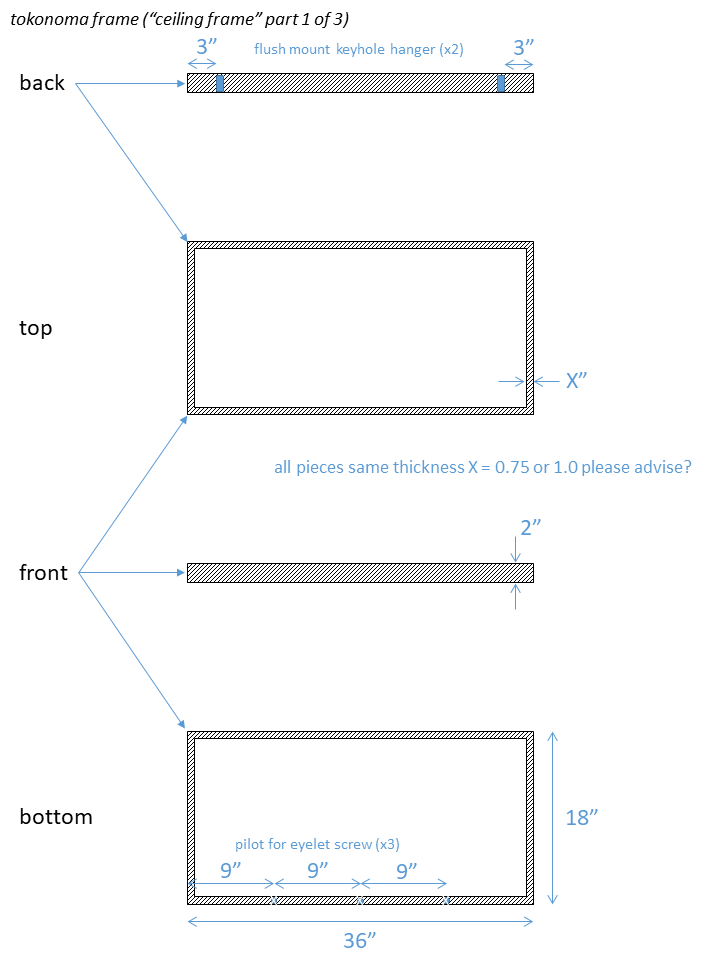

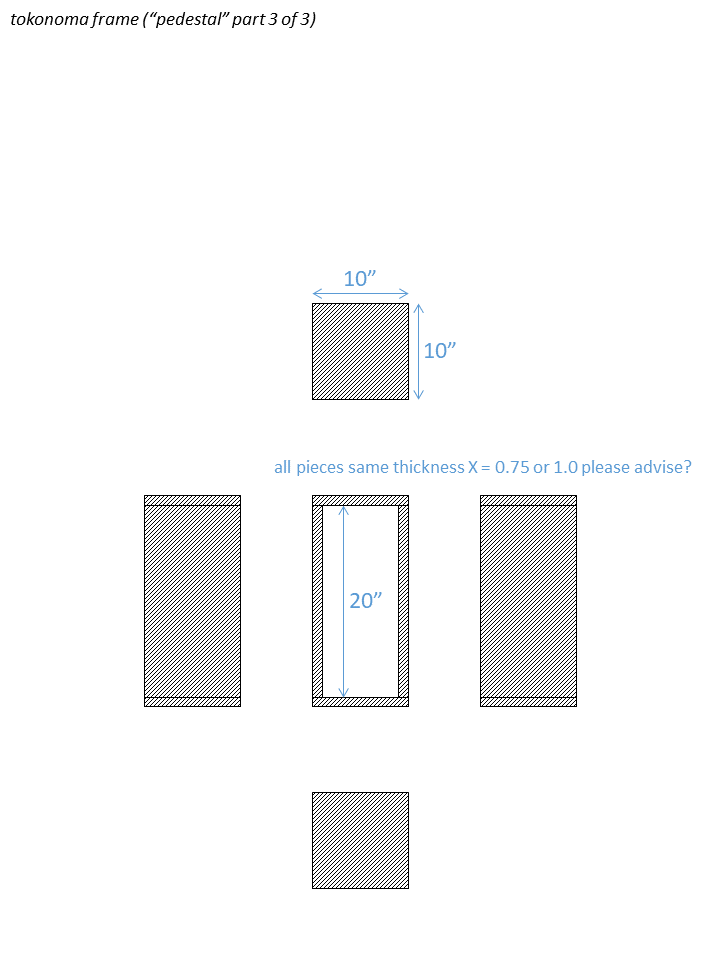
From left-to-right these are a cantilevered frame, platform and pedestal. The installation concept is that the platform can be placed on the floor against a gallery wall, and the frame hung directly above the platform, to define a tokonoma-like space. The woven and shibori-dyed piece that I made will hang from the frame like a scroll in a tokonoma, while a ceramic piece will sit on the pedestal, which will sit on (or perhaps next to?) the platform.
It’s really amazing to be able to work with Isaac in his studio — Isaac took the drawings I made and formulated a start-to-finish plan for fabricating the frame, platform and pedestal from stock planks of tanoak that he had in his inventory. The tanoak (Notholithocarpus densiflorus) was a local Fort Bragg tree that was milled and the lumber carefully dried as part of a workshop that Isaac participated in many years ago. The planks Isaac had were only 6″ wide, so after the rough milling we had to start by joining together some pieces side-by-side to make the 10″x20″ side and 10″x10″ end pieces for the pedestal:

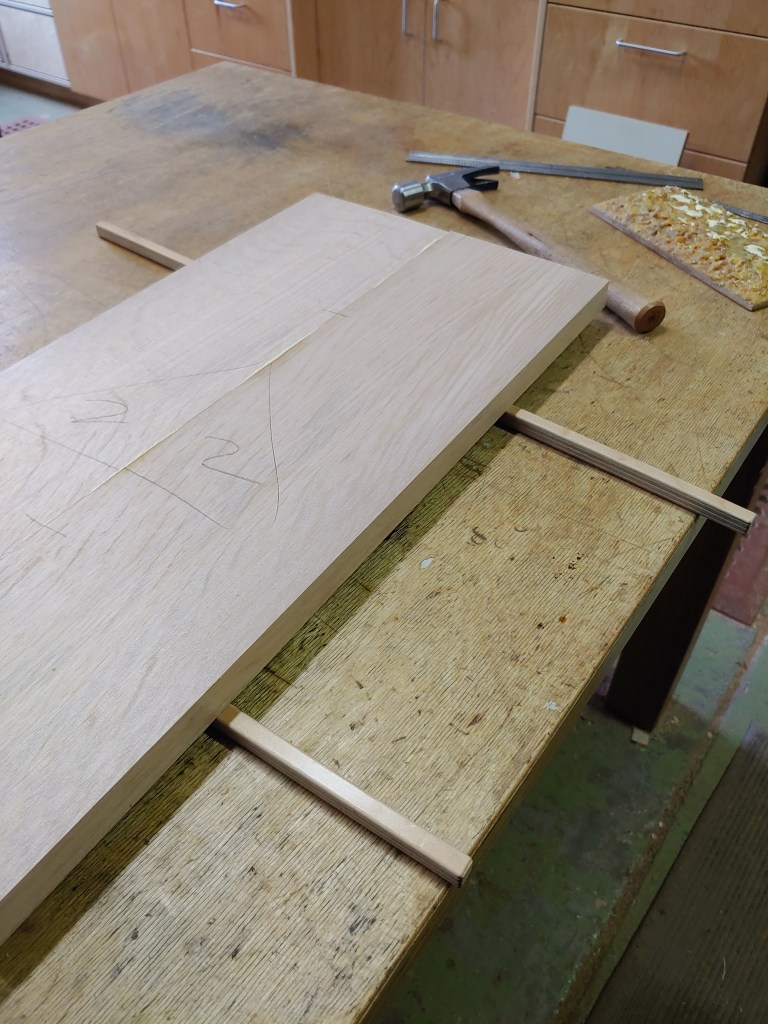
As with most custom joinery, the wood pieces in everything we made are held together mainly by a modern wood glue, but a fair bit of work goes into cutting pieces to fit well and adding various reinforcements to the joins. In the case of the pairs of planks we joined (as shown in the right image above), we used a biscuit cutter to make matching slots on each side of a join (right image below). A small piece of compressed wood (a “biscuit”) is inserted into the slots; with application of glue the biscuits expand a bit, provide extra surface area for all the glue to hang onto, and generally help to keep the boards well aligned. As they start drying the parts have to be clamped together (left image above) — one of the key things about working in a well-equipped shop is having lots of clamps of various sizes on hand!
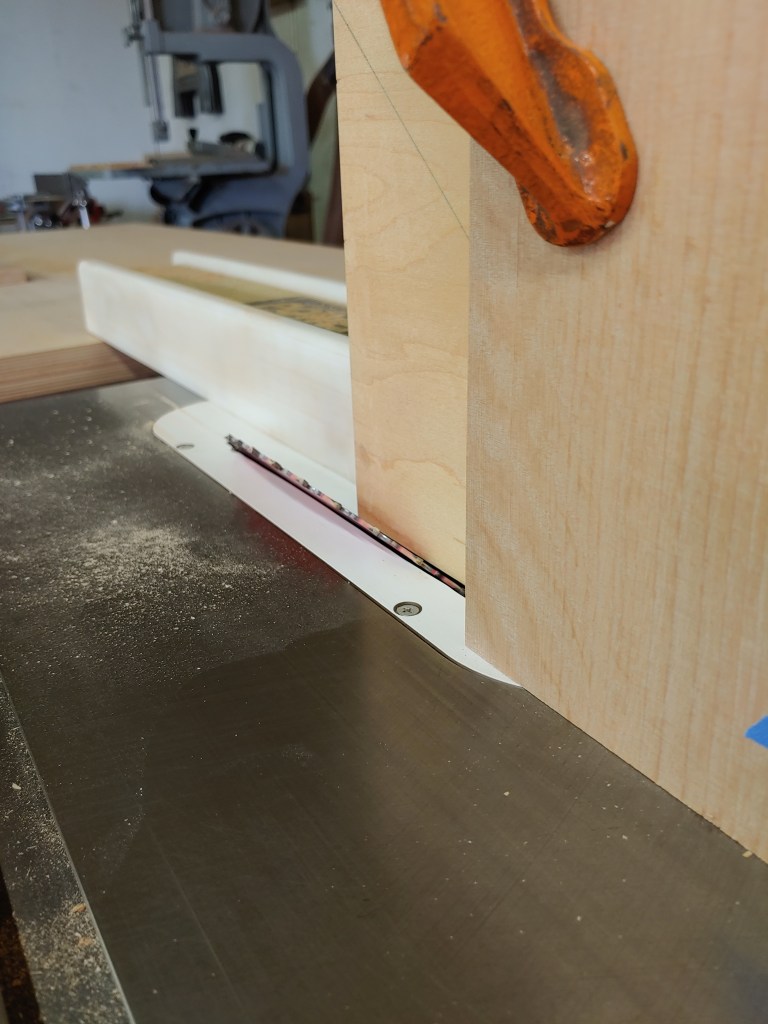
After the joined boards were dry, we first had to scrape down the seam to smooth and level (left image below), and then they were cut to dimension for the pedestal sides and ends. We then had to cut 45 degree bevels on all the edges to make the joins, which was done on a table saw using a fancy rig that Isaac made (center image below):


We then cut biscuit slots and applied glue (right image above), and then had to clamp the whole thing together in two stages. The images below of the clamped glue-up gives a feeling for the tooling and expertise required to do this well:


The cantilevered frame, and the nearly identical “frame” underlying the pedestal were assembled in similar fashion although the starting pieces (being well under 6″ wide) were rough cut straight from Isaac’s stock lumber, and in place of the biscuits we used a similar type of joining technique with mortises (slots) and tenons (compressed wood tabs):
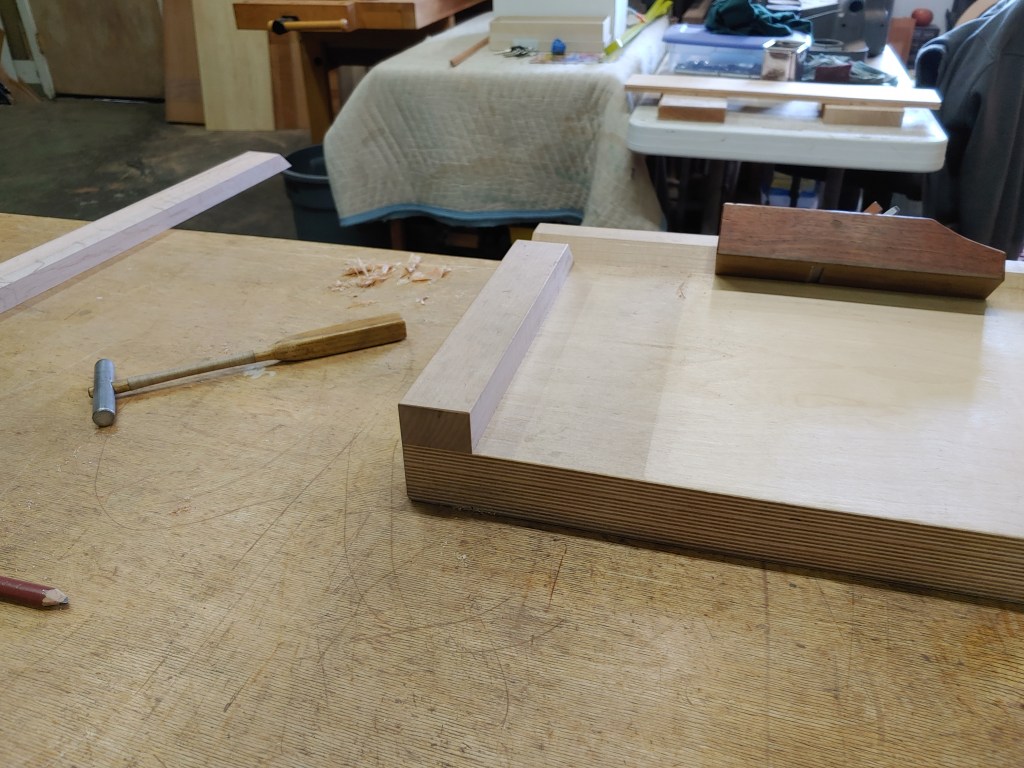


The left image above shows a special rig (also visible in the background of the center image) that Isaac calls the shooter, comprising a plane and alignment block that can be used to fine-tune the 45 degree angle cuts beyond the precision achievable with a miter saw. It took a while to get the hang of using the shooter and I’m still rather clumsy with it, but as we worked it became very clear how crucial it is to take the time for such fine-tuning in order to achieve nice clean joins without egregious gaps. A couple of views of the glued-up frame:


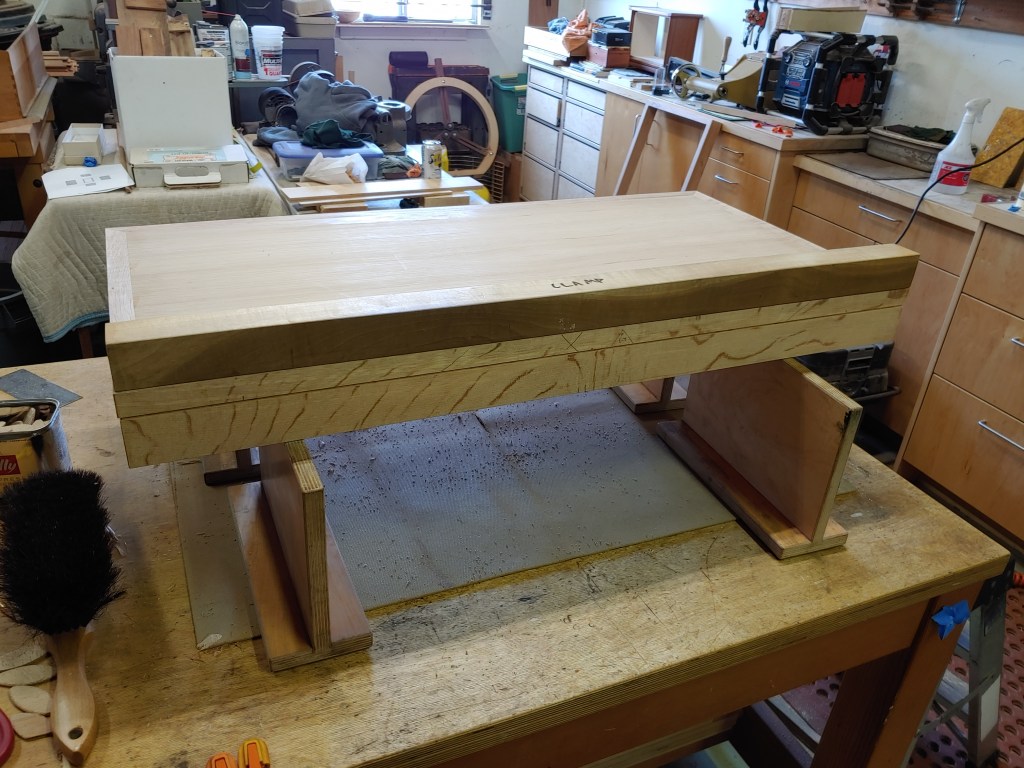
The most complicated piece was actually the top of the platform, which rests on a frame just like the cantilever frame shown above. The central area of the platform top is a lovely section of plywood, but it is framed-in by thin strips of the tanoak lumber that hide the plywood edges and match the grain of the support frame.


The strips are joined to the plywood board using biscuits and glue, and meet each other at 45 degree bevels with just glue. Fitting and fine-adjusting the edging strips took a lot of our time and really depended on Isaac’s expertise to achieve a nice result. This entire top assembly was then glued down to the support frame with biscuits for alignment and reinforcement. Isaac used a router to cut a “rabbit” or “relief” line around the joining edge of the support frame, which adds a nice architectural detail and also covers up any small dimensional mismatch between the top assembly and the support frame:
Getting all of this assembled took pretty much a day and a half, and then we spent a few hours at the end finishing. Some cracks and gaps were filled with epoxy, all the edges and corners were routed to a fine radius, surfaces and edges were sanded, and finally we applied a light coat of wax all over.
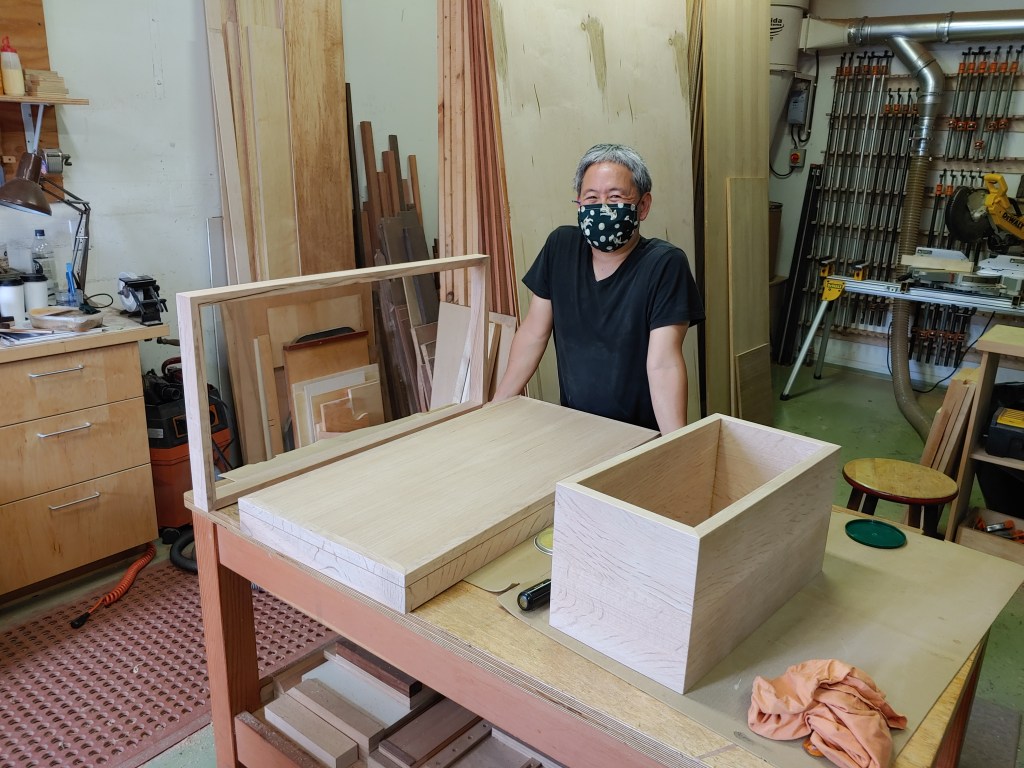

And here we have our final products, with me (above left) and with Isaac (above right) holding the three pieces in roughly the arrangement I have in mind for the installation…
