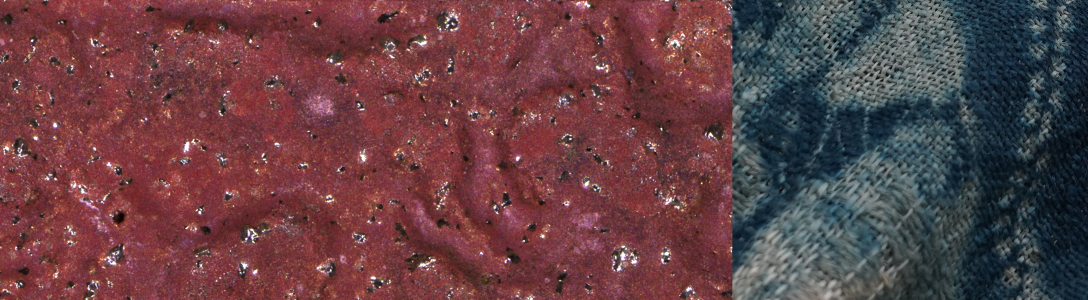
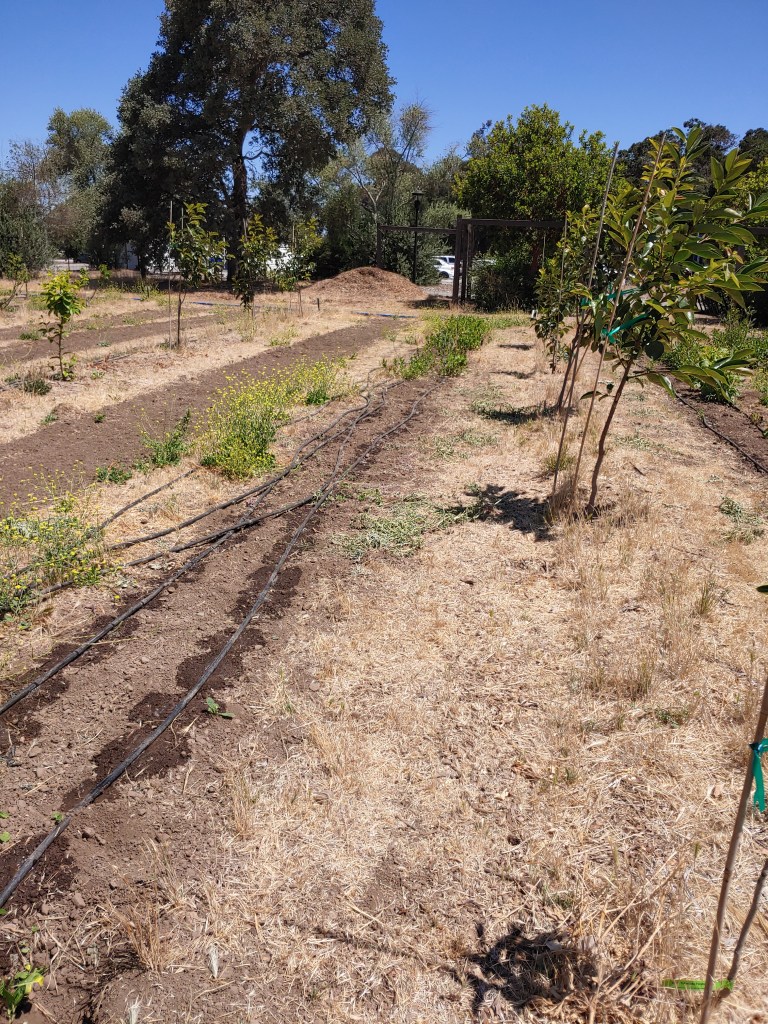
Back in March the good folks over at the O’Donohue Family Stanford Educational Farm helped me start some indigo seedlings (two trays of 72 each), and then during the COVID shutdown Allison and Will transplanted them to a row out in the garden and tended them all the way to harvest! The photos below show the indigo row just after first harvest (the empty patch in the middle was apparently created by gophers eating a lot of the plants — maybe 1/3 to 1/2 of them!) and a closeup of some plants after their main stalks were clipped. There’s a dried-up indigo plant in the foreground of the closeup, which has turned blue-ish because of the production of indigo dye (see below).
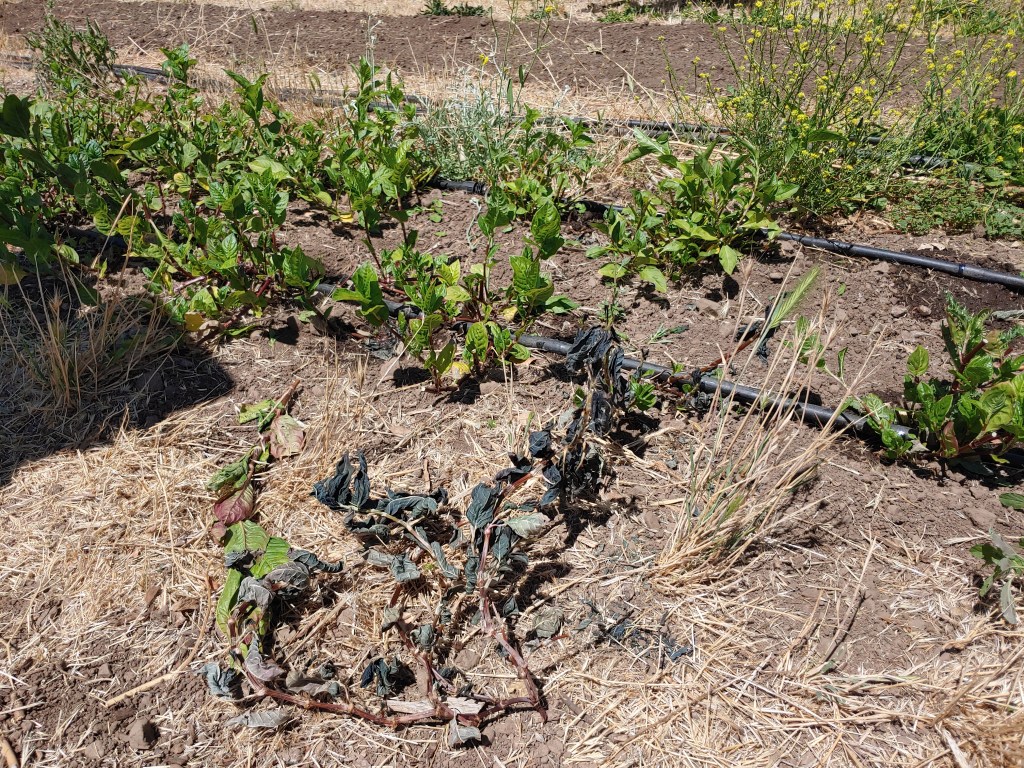
I picked up two bins of harvested stalks a couple of days ago; we’re hoping that enough of each plant was left in the ground for them to grow back and provide a second harvest, and hopefully some seeds at the end of the season.
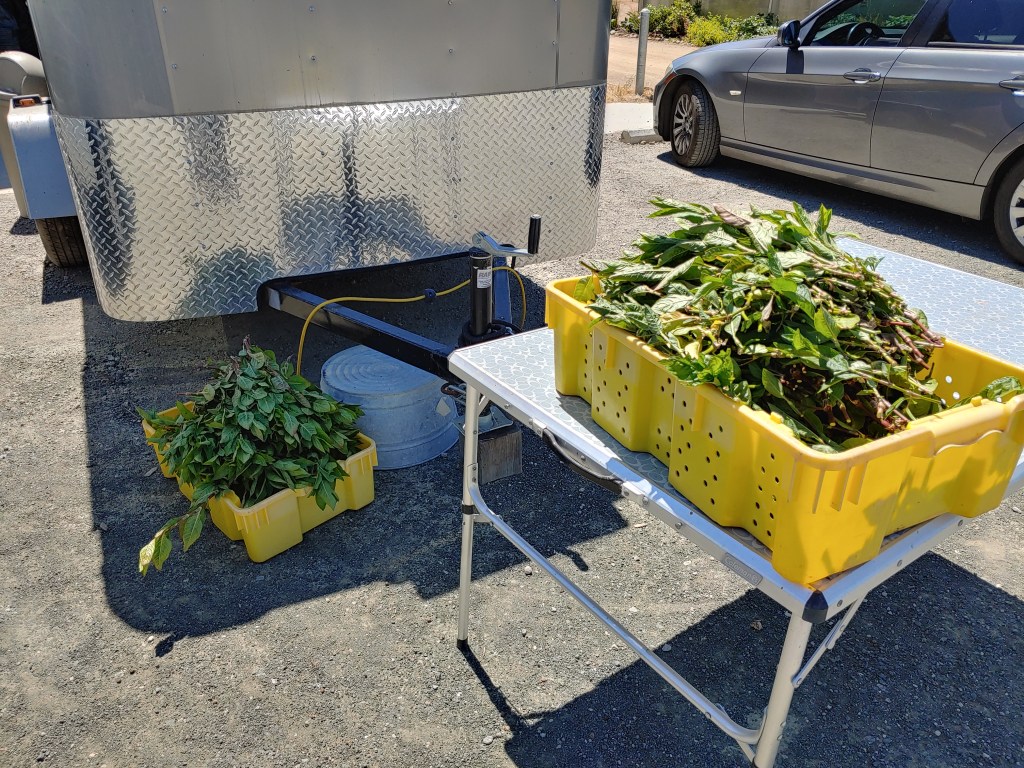
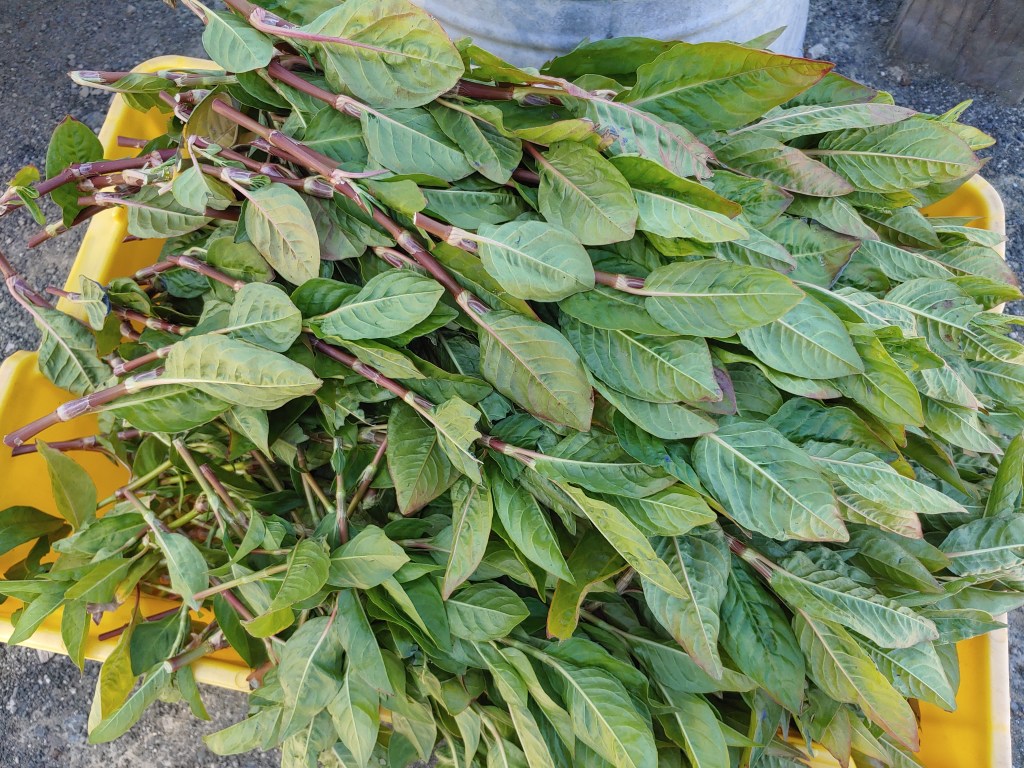
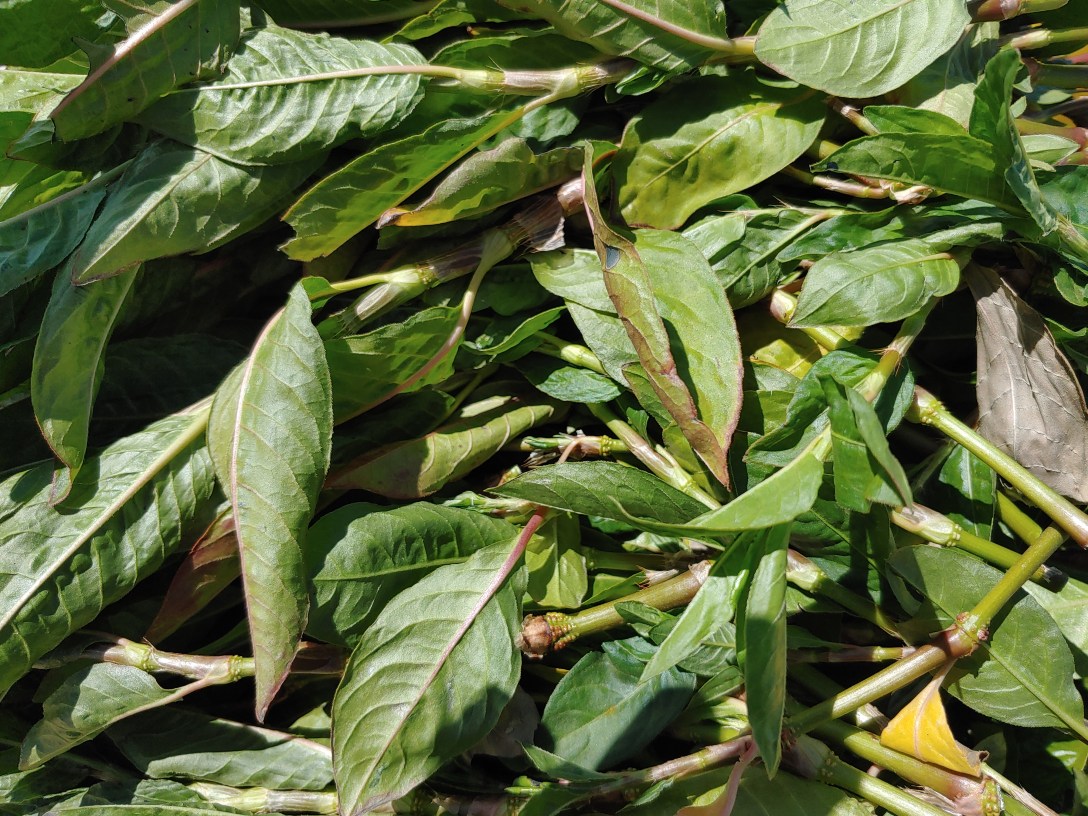
For producing dye we just want the leaves, which requires quite a bit of plucking/stripping…


Following the procedure outlined in Singing the Blues: Soulful Dyeing for All Eternity by John Marshall, I stripped most of the leaves roughly with the leaf “stems” still attached but took about ten percent of the leaves more finely removing even the spine of the stem (like prepping large leaves of kale for eating). The reason for this will become clear soon. The total yield was around 4kg of leaves. The whole leaves are steeped in hot water for ten minutes to make a leaf broth/tea — I tried using a hop strainer (beer-making equipment) for this step.

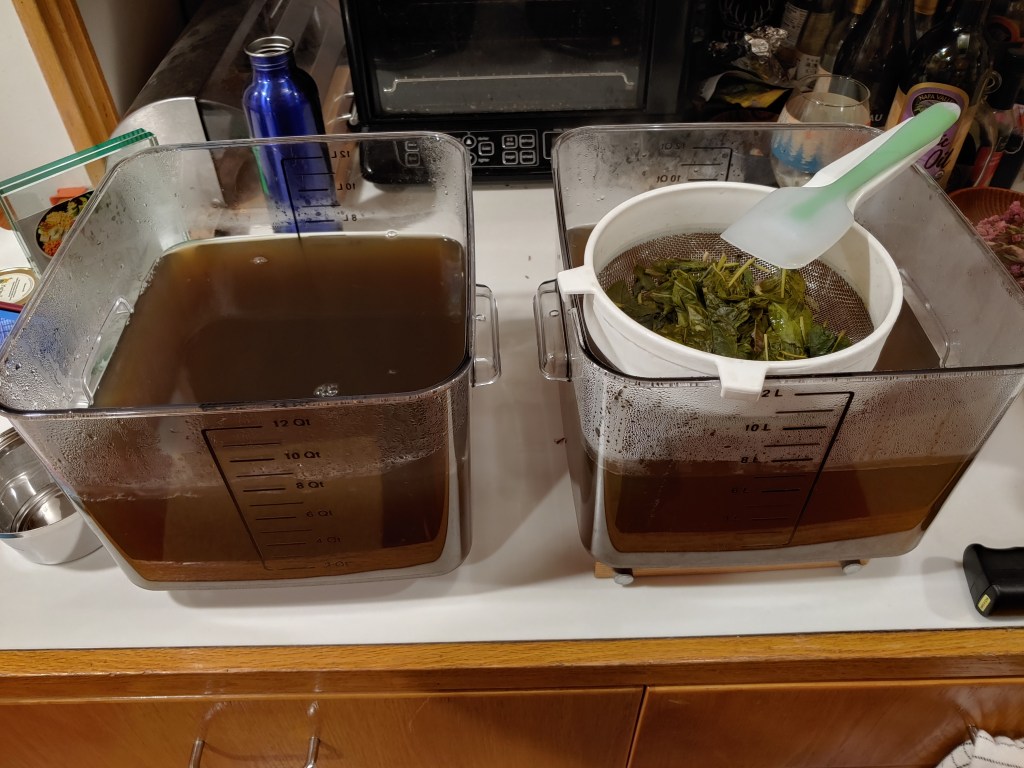
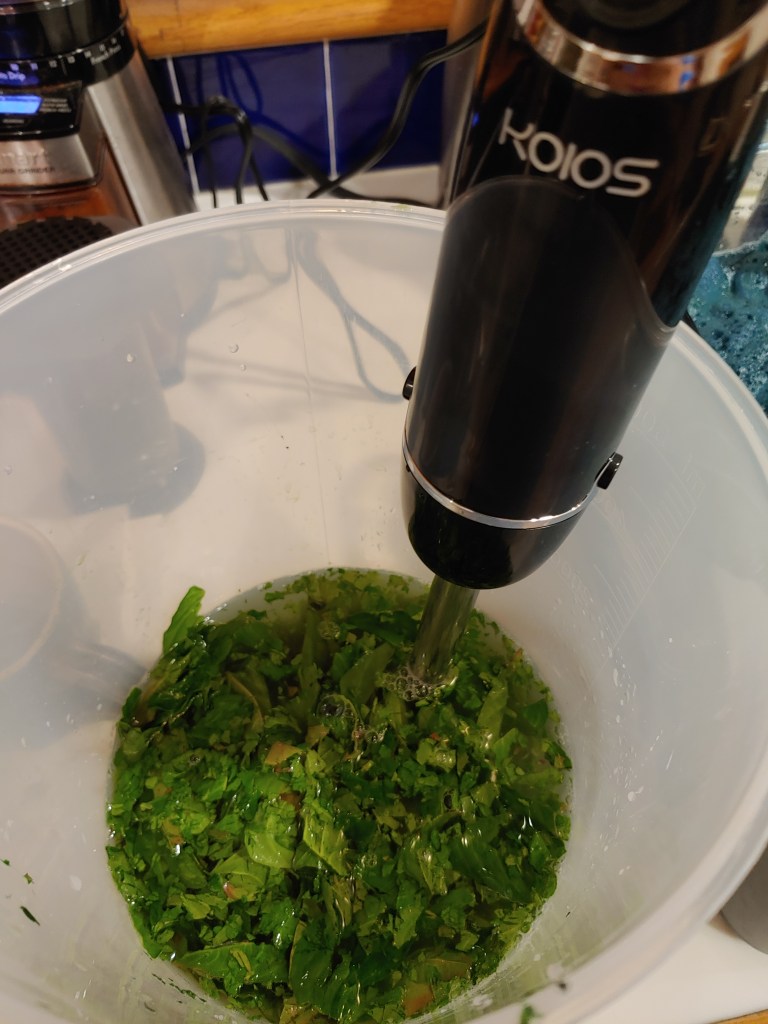
The strained amber/brown liquid now contains water-soluble indigo dye precursor, which will be converted to indigo in the next two steps. While waiting for the leaf tea to cool back to around 110F, the smaller batch of more finely prepared leaves are shredded in cold water with a blender (had we left the fibrous leaf stems/spines on these might have tangled up the blender). This releases some enzymes that we need from within the leaf cells, which aren’t active in the tea because they were inactivated by the heat needed to steep out the precursors effectively. The enzyme dose is mixed with the cooled tea — the second photo below shows one bin with tea+enzyme and one without.

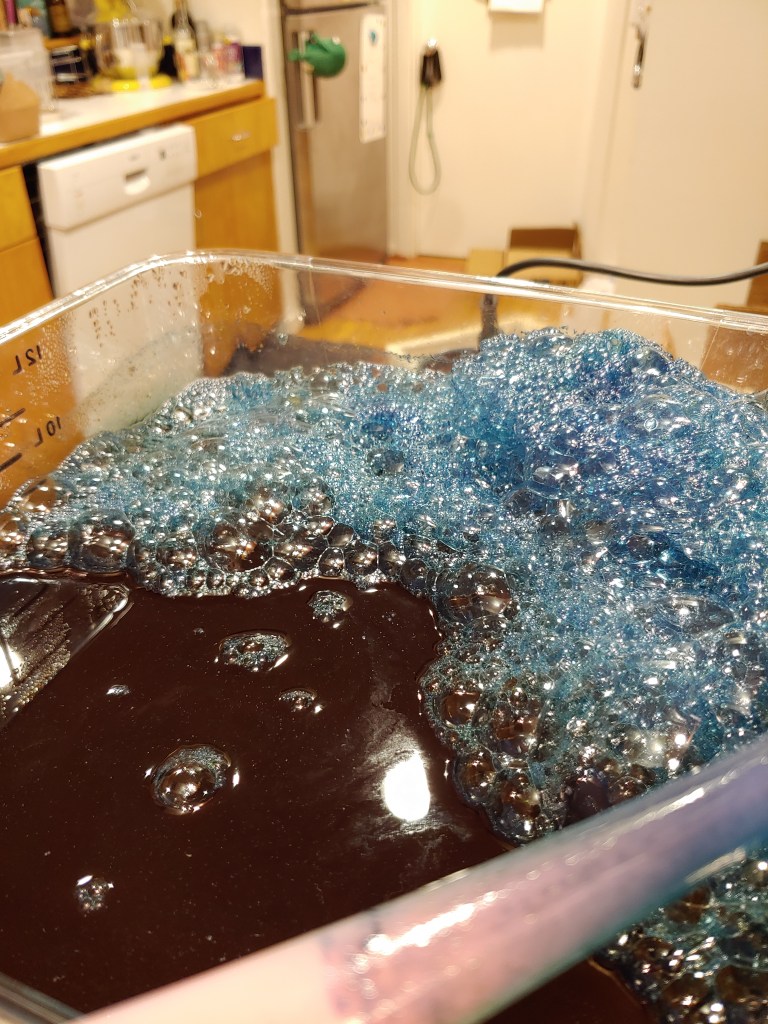
We give the enzymes 30 minutes to do their work, and then move on to the magic step. To complete the conversion to indigo dye, we have to raise the pH of the mixture and then oxidize it. The film below shows me adding a few doses of pickling salt to raise the pH, and then stirring the mixture vigorously to aerate it. As some bubbles form, you can see them start to acquire a blue tint — actual indigo dye! The video is just over two minutes long and the real magic happens right at the end…
The following photos show the mixture after I finished stirring (got tired), and then three bins representing the entire harvest’s worth of processed leaf tea.

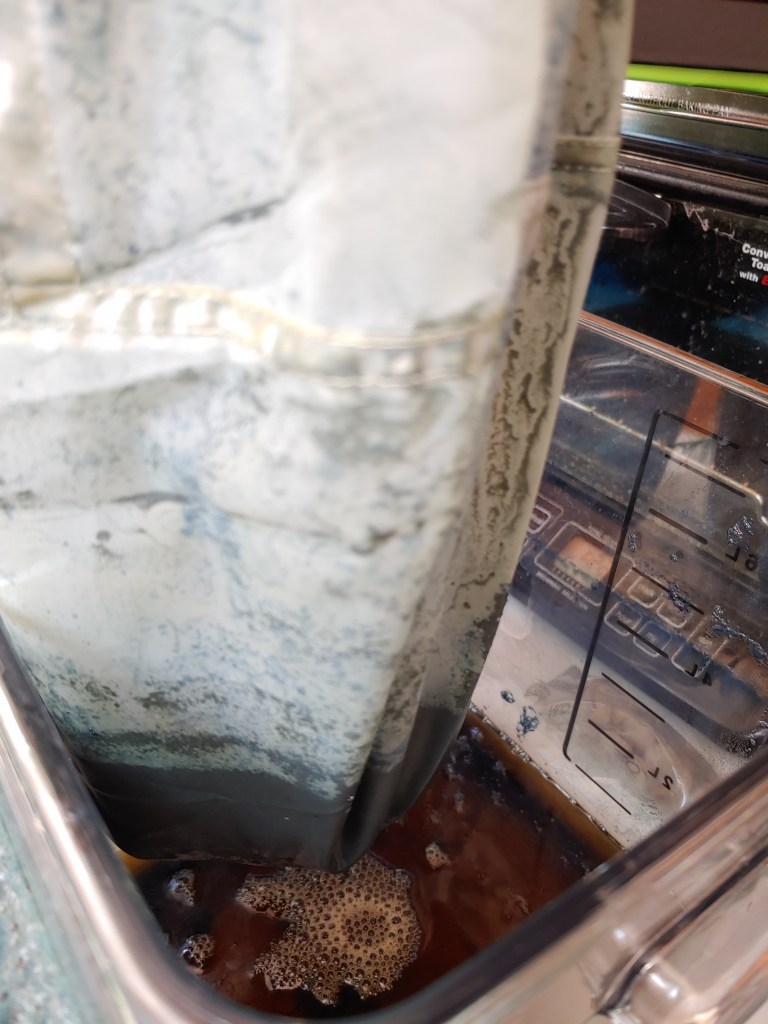
Now it turns out the hard part is to extract the actual indigo dye from the liquid, for storage and later use in dyeing textiles. John Marshall’s book suggests leaving the processed liquid to sediment, as the indigo dye precipitates into fine particles. This being my first time trying the procedure I made some decisions that led me down a different path (explanation below in case you’re interested), in which I used filter bags to strain the entire batch of processed liquid. This turns out to be somewhat tricky — the dye particles are sufficiently fine that you need to “prime” the filter bags by running a quantity of liquid through them and forming a thin lining layer of dye particles on the inside of the bag before it really starts to strain well. Before this layer builds up a lot of dye leaks through, and after you have this layer you need to re-run the liquid through the bag in small doses so that you don’t bust through the liner layer or spill around the edges of it. Below are a photo of a filter bag dripping, and a final photo of the inside of a drained bag with a sludgy deposit of actual indigo dye!

As I write this blog post I’m still working my way through filtering all the processed leaf tea. It is slow going and next time around I will make a better attempt at getting the liquid mixture to sediment and/or use a Büchner funnel. Anyway, after I’m done I’ll update with a measure of the total dry weight of dye recovered!
For those who might be curious about where I think I went wrong with the sediment step… I ended up working with a more concentrated leaf tea than recommended in the Marshall book because I was doing all this late at night (it took me almost five hours to strip 4kg of leaves!) and I wanted to get away with three steeping batches rather than five. My bins of liquid didn’t look very different after letting them sit overnight so I assumed they had not separated, perhaps (I thought at the time) because the concentration of dye particles was too high. I didn’t want to just dilute them because I was worried about changing the pH, so I just went straight into the filter bags with all the liquid. After managing to strain some small batches relatively well, I came to appreciate that the clear filtered run-off from the filter bags is still a rich amber in color and thus looks quite dark in large quantities. It thus occurs to me that maybe my solutions had separated after leaving them to sit the first night, and I should have tried siphoning off the upper portions through a clear tube to check whether or not the dye particles were still floating in suspension. Live and learn.
